Stories & Insights
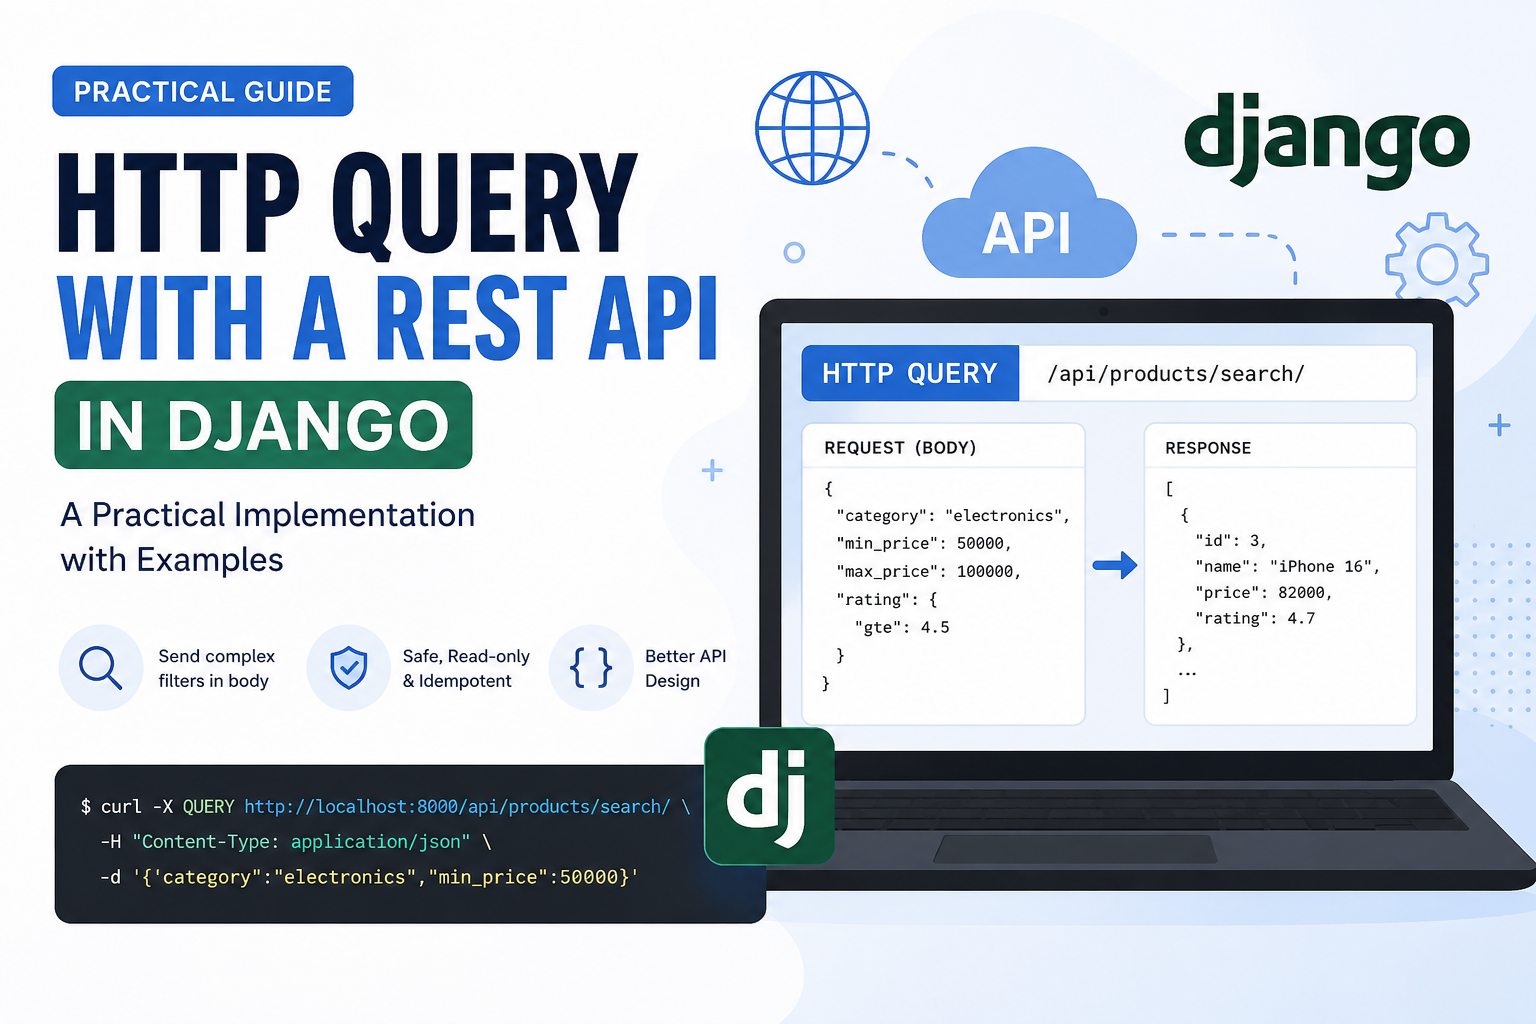
The new HTTP method : QUERY
uv Cheat Sheet
Coming from venv + pip? uv replaces both — it manages the virtualenv and installs packages. You rarely activate the venv manually; uv run <cmd> runs a command inside the project's .venv automatically. Mental model: venv/pip → uv You used to… With uv python -m venv .venv uv venv (or automatic on sync) source .venv/bin/activate not needed — use uv run … pip install -r requirements.txt uv sync pip install <pkg> uv add <pkg> pip uninstall <pkg> uv remove <pkg> pip install -U <pkg> uv lock --upgrade-package <pkg> pip freeze > requirements.txt uv export --no-hashes -o requirements.txt python manage.py <cmd> uv run python manage.py <cmd> python script.py uv run python script.py Basics uv sync # create .venv + install everything from uv.lock uv sync --upgrade # re-resolve and upgrade deps within pyproject bounds uv add django-extensions # add a dependency (updates pyproject.toml + uv.lock) uv add --dev pytest # add a dev-only dependency uv remove django-extensions # remove a dependency uv lock # regenerate uv.lock from pyproject.toml uv tree # show the dependency tree uv pip list # list installed packages in the env uv python pin 3.12 # pin the Python version (writes .python-version) Django management (this project) Run any manage.py command by prefixing with uv run: uv run python manage.py runserver # dev server → http://localhost:8000 uv run python manage.py shell # interactive Django shell uv run python manage.py makemigrations # create migration files from model changes uv run python manage.py migrate # apply migrations to the database uv run python manage.py showmigrations # list migrations + applied state uv run python manage.py createsuperuser # create an admin user uv run python manage.py collectstatic # gather static files → staticfiles/ uv run python manage.py test # run the test suite uv run python manage.py check # system checks uv run python manage.py dbshell # open the database shell Tip: uv run manage.py <cmd> (without python) also works. Activating the venv (if you prefer the old way) uv run is recommended, but you can still activate the venv like before: source .venv/bin/activate python manage.py runserver # now plain python works deactivate Advanced uv run --with ipython python manage.py shell # run with an extra package, no install uv sync --frozen # install exactly from uv.lock, never re-resolve (CI) uv sync --no-dev # production install, skip dev deps uv export --no-hashes -o requirements.txt # regenerate requirements.txt from the lock uv cache clean # clear uv's global download cache uv self update # update uv itself Rules of thumb Commit pyproject.toml and uv.lock; never commit .venv/. After pulling changes that touch pyproject.toml/uv.lock, run uv sync. Add packages with uv add, not pip install — so the lockfile stays accurate.
Instantly Share Your Local Project: No Domain Required using Cloudflare Quick Tunnels
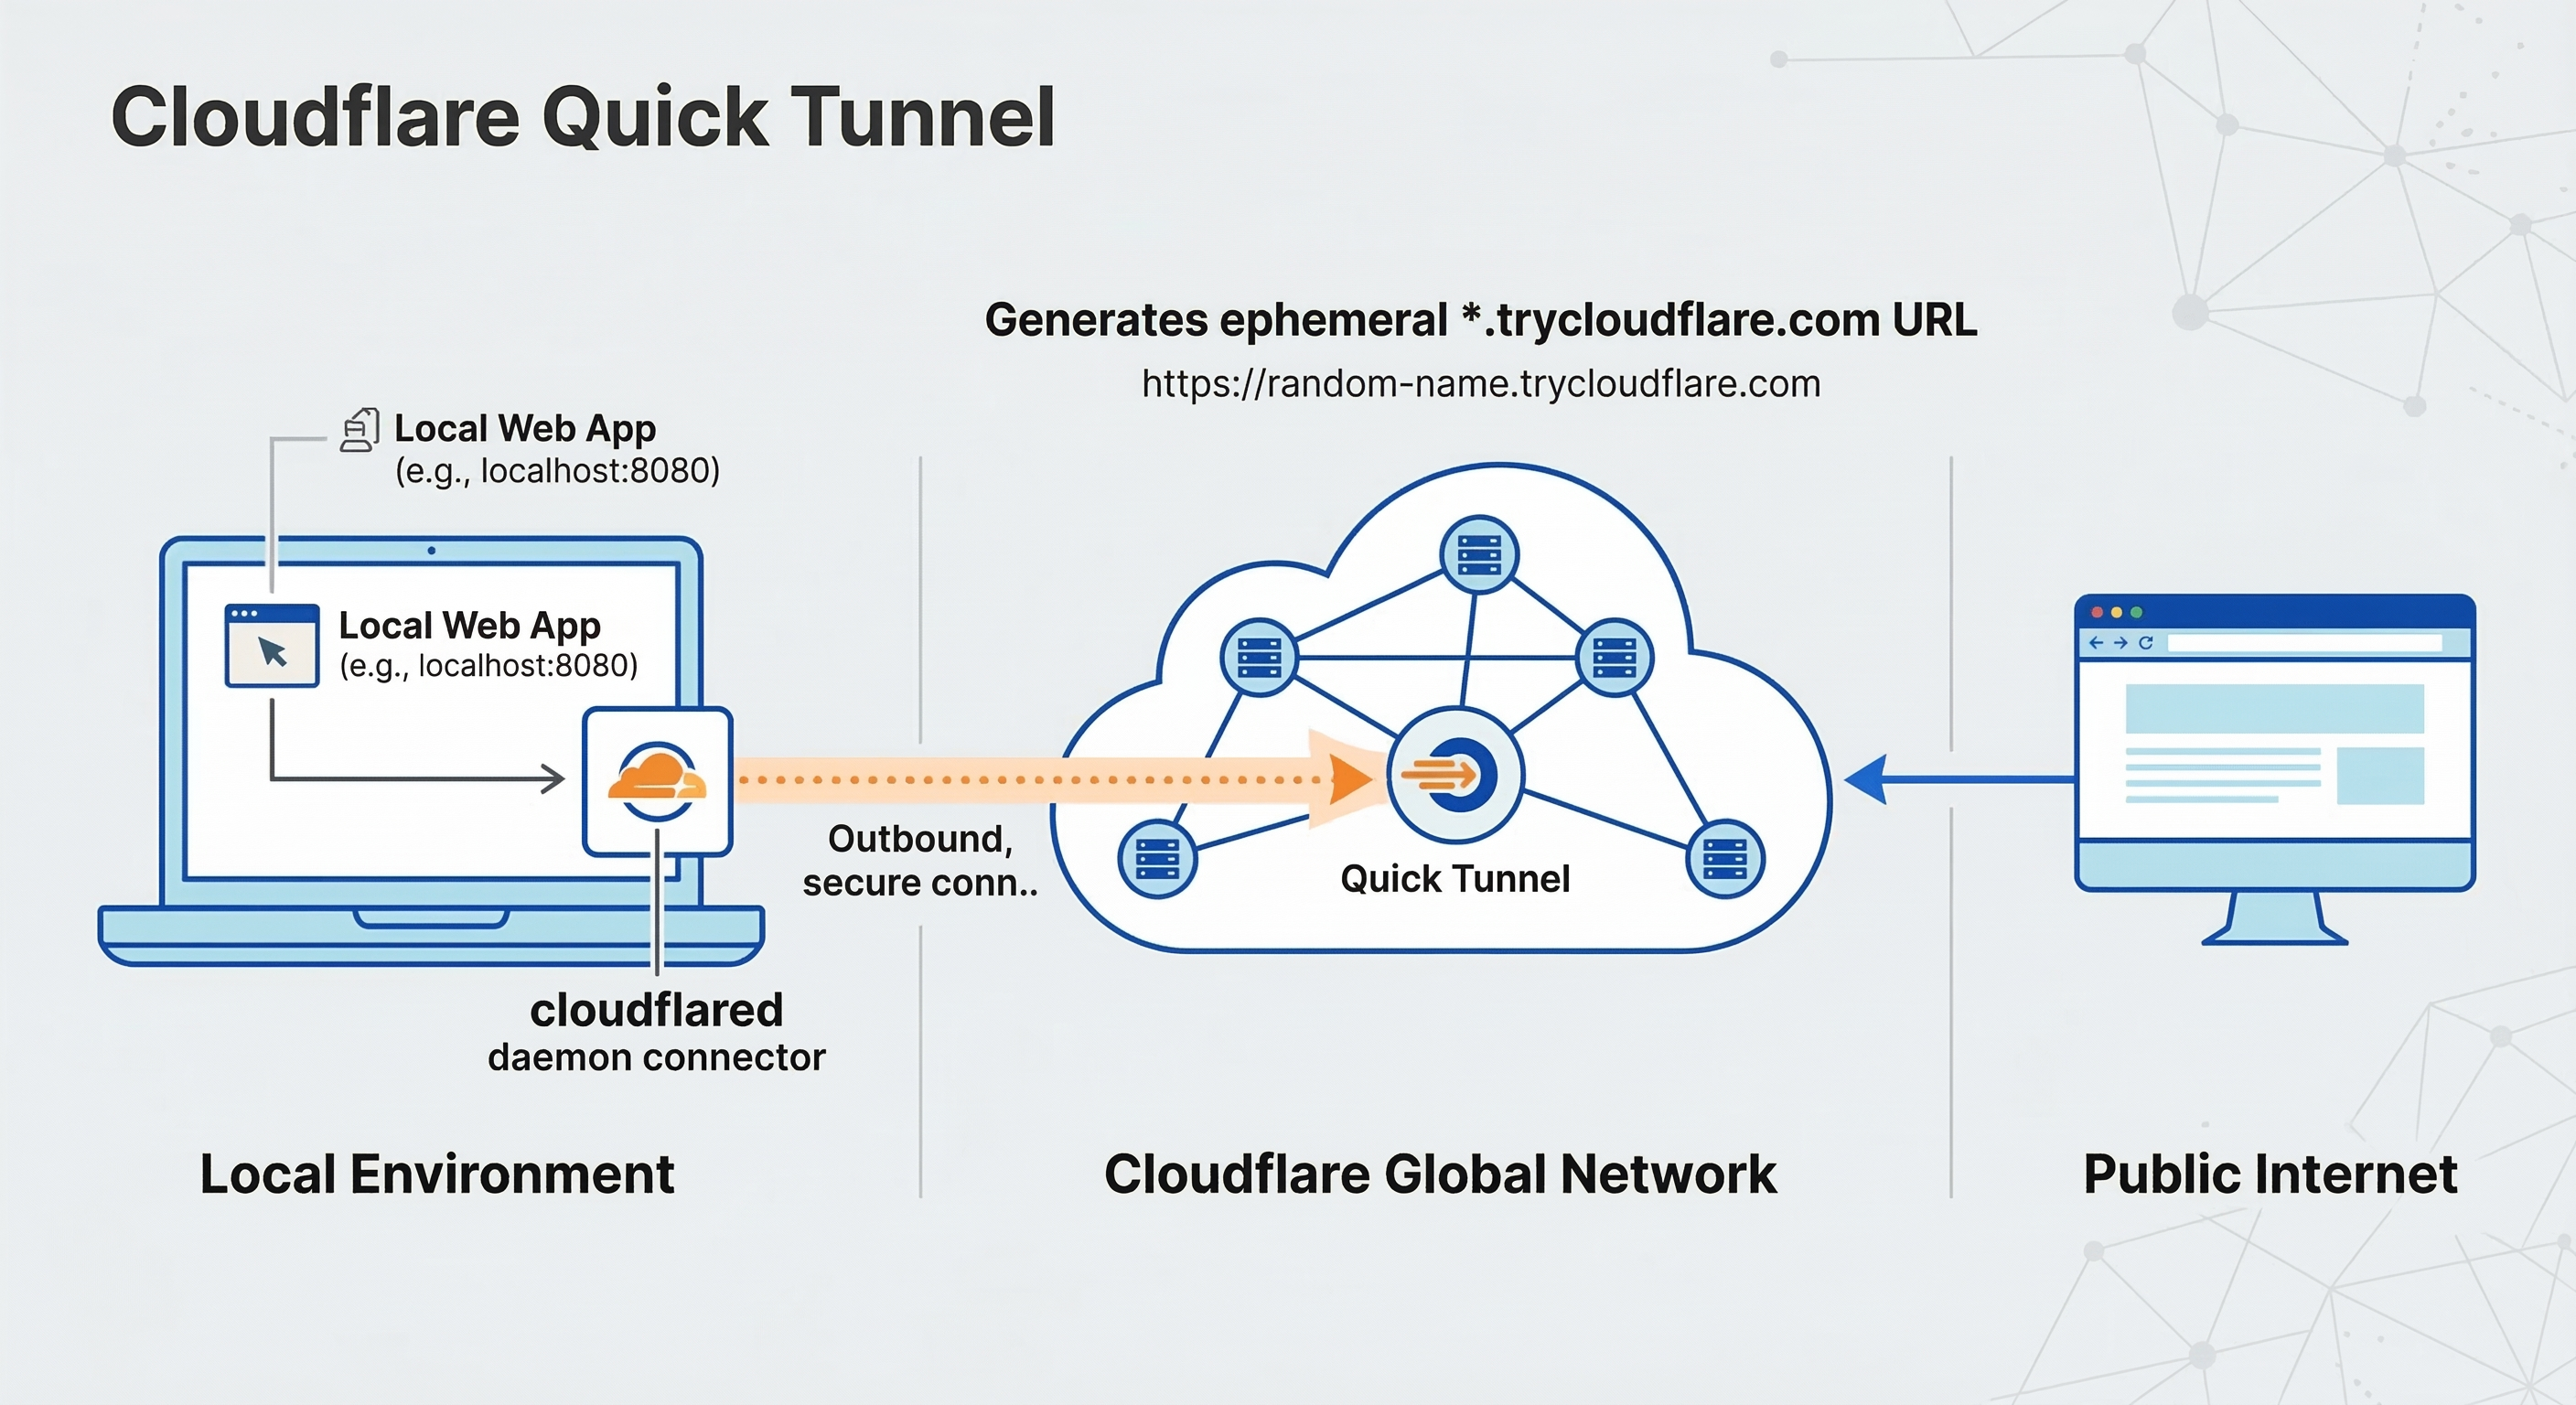
As developers, we often need to share our local work. Whether it’s showing a client a new feature, testing a webhook callback from a third-party API, or just demoing a project to a colleague, exposing localhost to the internet is a common challenge. Traditionally, this involved navigating the dark arts of router port forwarding, dealing with dynamic IPs, or paying for static IP addresses. Cloudflare Tunnel (formerly Argo Tunnel) changed this game, but often requires you to own a custom domain and configure DNS. But what if you don't have a domain yet, or just need a quick, temporary solution? Enter Cloudflare Quick Tunnels. This feature allows you to create a secure, publicly accessible URL for any local port on your machine instantly, without needing a custom domain, port forwarding, or complex configuration. You get a random, temporary trycloudflare.com subdomain that works immediately. Here is how you can spin up a public tunnel for your local machine in three simple steps. Prerequisites Before you begin, ensure you have a service running locally that you want to share (for example, a web server running on http://localhost:8080). Step 1: Install the cloudflared tool First, you need to download and install the cloudflared daemon, which acts as the bridge between your local machine and the Cloudflare network. Choose the command for your operating system: On macOS (using Homebrew): On Linux (Debian/Ubuntu): On Windows: You can download the latest .exe binary directly from the Cloudflare downloads page and add it to your system PATH. Step 2: Spin up the Tunnel Now that cloudflared is installed, you can start the tunnel with a single command. Open your terminal or command prompt and run the following, replacing 8080 with the port your local service is running on: This command tells Cloudflare: "Take the traffic destined for the URL you are about to generate and send it securely to localhost:8080 on this machine." Step 3: Access and Share your App After running the command, cloudflared will generate several lines of log output. Look closely for a section that looks like this: That’s it! Anyone in the world can now click that trycloudflare.com link and access your local application. Understanding the Architecture How does this work without touching your router settings? This diagram illustrates the flow: The cloudflared agent running on your machine establishes an outbound connection to the Cloudflare global network. When a user tries to access your temporary trycloudflare.com URL, they hit the Cloudflare edge. Cloudflare then routes that traffic through the existing secure connection directly to your local service. Because the connection is outbound from your machine, you don’t need to open any inbound ports on your router or firewall. Key Security and Usage Considerations While Quick Tunnels are incredibly convenient, it's important to understand how they differ from fully managed, named Cloudflare Tunnels: Ephemeral URLs: The trycloudflare.com URL is temporary. Every time you stop and restart the cloudflared command, you will get a completely new and random URL. This makes it perfect for quick demos, but unsuitable for production or permanent remote access. Public Access: By default, anyone who guesses or acquires your unique trycloudflare.com URL can access your local service. There is no built-in authentication for Quick Tunnels. Do not share sensitive data using this method without adding your own authentication to the local application. No Dashboard Visibility: Quick Tunnels are handled automatically. They do not appear in your Cloudflare dashboard, and you cannot apply Cloudflare Access policies or other Zero Trust features to them. Summary Cloudflare Quick Tunnels are an invaluable tool for developers needing to share local progress instantly. If you need a persistent URL, integration with the Cloudflare dashboard, or advanced Access/Security policies, you should upgrade to a Named Tunnel (which does require a custom domain on Cloudflare). But for everything else, Quick Tunnels are the fastest way to get your localhost onto the internet.
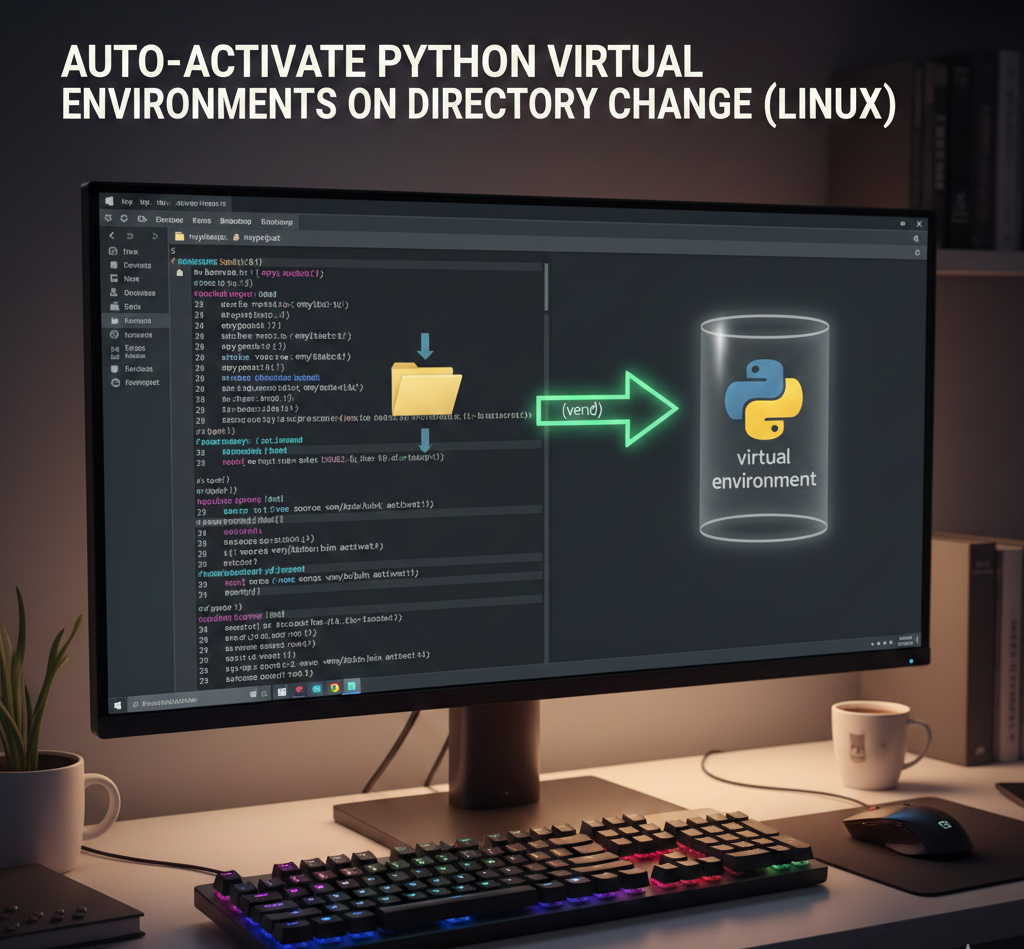
🚀 Automatically Activate Python Virtual Environments When Entering a Project Directory (Linux)
If you work on multiple Python projects, you’ve probably typed this command hundreds of times: source venv/bin/activate It’s easy to forget, and running code outside the correct environment can cause confusing bugs. In this article, you’ll learn how to automatically activate a Python virtual environment whenever you enter a specific directory—on any Linux machine or server. 🎯 Why Auto-Activate Virtual Environments? Prevents running code with the wrong dependencies Saves time and mental overhead Works seamlessly with SSH, VS Code Remote, and servers Ideal for Django, FastAPI, Flask, and data projects 🧩 How This Solution Works Bash provides a special hook called PROMPT_COMMAND that runs before each command prompt is displayed. We use this hook to: Detect your current directory Check if a virtual environment is already active Activate the environment automatically when needed 📋 Prerequisites Linux system (Ubuntu, Debian, Arch, etc.) Bash shell Python virtual environment already created Basic terminal access 🛠 Step-by-Step Setup Step 1: Open your .bashrc file nano ~/.bashrc Step 2: Add the auto-activation logic Paste the following code at the end of the file: 🔹 Replace: /full/path/to/your/project with your project directory /full/path/to/your/venv with your virtual environment path Step 3: Reload the shell configuration source ~/.bashrc ✅ What Happens Now? When you cd into your project → virtual environment activates automatically When you open a new terminal inside the project → already activated When you’re outside the project → no activation 🧪 Example Behavior 🧠 Why This Approach Is Safe ✔ No repeated activation ✔ No errors if the virtualenv is missing ✔ No performance impact ✔ Works on remote servers Multiple Projects You can duplicate the function for multiple directories or convert it into a loop. 🆚 Alternative: direnv Tools like direnv can also do this, but they require extra installation and configuration. This Bash-only approach is lightweight, portable, and dependency-free. 🧩 Supported Environments Ubuntu 20.04 / 22.04 Linux servers SSH sessions VS Code Remote SSH WSL (Linux mode) 🏁 Final Thoughts Automating virtual environment activation is a small change that dramatically improves your daily Python workflow. Once you set it up, you’ll wonder why you didn’t do it sooner.
How to Install Python 3.12 on Ubuntu 22.04